![衣柜里有洗衣机和烘干机](https://kitchenaid-h.assetsadobe.com/is/image/content/dam/business-unit/whirlpoolv2/en-us/marketing-content/site-assets/page-content/oc-articles/how-to-stack-a-washer-and-dryer/how-to-stack-a-washer-and-dryer-masthead.jpg?fit=constrain&fmt=jpg&wid=2875)
如何堆放洗衣机和烘干机
住在狭小的房间里并不能阻止要洗的衣服堆积起来。当你住在一个面积较小的空间,比如公寓或公寓,一个可堆叠的洗衣机和烘干机对保持你的家庭整洁是必不可少的,因为它们占用的空间更小,甚至可以安装在衣柜里。要学习如何堆放你现有的或新的衣物,请阅读这篇关于如何堆放洗衣机和烘干机的分步指南。
注意:请参阅机器的安装手册,因为堆叠说明以及洗衣机和烘干机的尺寸各不相同。使用本指南作为一般概述,但要了解具体说明和信息,请参阅您的手册。
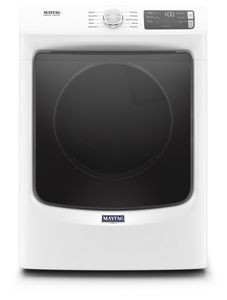
更多选择,请看智能洗衣机和烘干机从漩涡。
你需要的物品:
- 洗衣机和烘干机堆叠套件
- 纸板
- 朋友的帮助
手头的工具:
- 十字螺丝刀
- 可调扳手
- 水平
- 卷尺
- 用户手册或安装说明
第一步:确保你的洗衣机和烘干机可以堆叠
在开始堆叠洗衣机和烘干机之前,请参阅您的用户手册,因为只有一些前置洗衣机和烘干机兼容堆叠。如果你要买一台新的洗衣机和烘干机,问问销售人员它们是否可以堆叠,然后检查一下惠而浦®可堆叠的洗衣机和烘干机为你找到合适的一双。
你能叠几台洗衣机和烘干机吗?
如果洗衣机和烘干机不是专门设计用来堆叠的,避免堆叠,尤其是如果它们不是由同一家制造商生产的,因为这会使保修期失效。把烘干机堆在不兼容的洗衣机上也是很危险的,因为振动会导致烘干机移动并可能掉落,有可能造成财产损失和人身伤害。
![Stacked washer and dryer with ruler icon 堆叠洗衣机和烘干机与标尺图标](https://kitchenaid-h.assetsadobe.com/is/image/content/dam/business-unit/whirlpoolv2/en-us/marketing-content/site-assets/page-content/oc-articles/how-to-stack-a-washer-and-dryer/how-to-stack-a-washer-and-dryer-step-2.jpg?fmt=png-alpha&qlt=85,0&resMode=sharp2&op_usm=1.75,0.3,2,0&scl=1&constrain=fit,1)
![](https://kitchenaid-h.assetsadobe.com/is/image/content/dam/business-unit/whirlpoolv2/en-us/marketing-content/site-assets/page-content/oc-articles/how-to-stack-a-washer-and-dryer/how-to-stack-a-washer-and-dryer-step-2.jpg?fmt=png-alpha&qlt=85,0&resMode=sharp2&op_usm=1.75,0.3,2,0&scl=1&constrain=fit,1)
第二步:测量存放洗衣机和烘干机的空间
在你开始之前,测量你想要用于洗衣机和烘干机的空间,以确保它们合适。洗衣机后部和墙壁之间至少要有5英寸的空间,如果你安装在壁橱里,洗衣机两侧和墙壁之间至少要有1英寸的空间,这取决于你的型号。
洗衣机和烘干机的门都应该能够完全打开,壁橱门从底部到地板应该有大约一英寸的空间,以帮助空气流通。如果安装了柜门或百叶门,则需要在柜门上设置上、下风孔。
具体要求可能因型号和品牌而异。一定要参考你的型号的安装说明或制造商网站上的信息。
![Close up of items in a stacking kit 近距离的物品在一个堆叠套件](https://kitchenaid-h.assetsadobe.com/is/image/content/dam/business-unit/whirlpoolv2/en-us/marketing-content/site-assets/page-content/oc-articles/how-to-stack-a-washer-and-dryer/how-to-stack-a-washer-and-dryer-2.jpg?fmt=png-alpha&qlt=85,0&resMode=sharp2&op_usm=1.75,0.3,2,0&scl=1&constrain=fit,1)
![](https://kitchenaid-h.assetsadobe.com/is/image/content/dam/business-unit/whirlpoolv2/en-us/marketing-content/site-assets/page-content/oc-articles/how-to-stack-a-washer-and-dryer/how-to-stack-a-washer-and-dryer-2.jpg?fmt=png-alpha&qlt=85,0&resMode=sharp2&op_usm=1.75,0.3,2,0&scl=1&constrain=fit,1)
第三步:购买洗衣机和烘干机堆叠套件
现在你已经把所有的尺寸和尺寸都准备好了,你需要购买一个和你的洗衣机和烘干机相同制造商生产的叠衣工具。工具包将包括一些螺栓,螺钉和支架,以确保所有东西在一起。
购物提示:要想安全正确地堆放洗衣机和烘干机,堆叠工具是必不可少的。并不是所有的模型都是一样的,所以要特别注意购买由同一制造商生产的、适合你的模型的工具包。
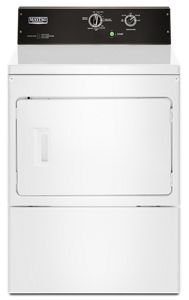
商店的漩涡®洗衣机和烘干机堆叠套件
![Washer with a leveling icon 带有水平图标的垫圈](https://kitchenaid-h.assetsadobe.com/is/image/content/dam/business-unit/whirlpoolv2/en-us/marketing-content/site-assets/page-content/oc-articles/how-to-stack-a-washer-and-dryer/how-to-stack-a-washer-and-dryer-step-3.jpg?fmt=png-alpha&qlt=85,0&resMode=sharp2&op_usm=1.75,0.3,2,0&scl=1&constrain=fit,1)
![](https://kitchenaid-h.assetsadobe.com/is/image/content/dam/business-unit/whirlpoolv2/en-us/marketing-content/site-assets/page-content/oc-articles/how-to-stack-a-washer-and-dryer/how-to-stack-a-washer-and-dryer-step-3.jpg?fmt=png-alpha&qlt=85,0&resMode=sharp2&op_usm=1.75,0.3,2,0&scl=1&constrain=fit,1)
第四步:放置洗衣机,检查水平度
将洗衣机移到安装位置,留下足够的空间完成安装。使用水平尺来确保洗衣机从一边到另一边,从前面到后面都是水平的。如果不是,在朋友的帮助下将洗衣机向后倾斜,并用扳手调整调平腿。
顺时针旋转扳手将缩短支腿,逆时针旋转将延长支腿。确保洗衣机是水平的,然后完全收紧腿和重新定位你的洗衣机。
![Close up of stacked white washer and dryer with a screw icon 靠近堆叠的白色洗衣机和烘干机与螺钉图标](https://kitchenaid-h.assetsadobe.com/is/image/content/dam/business-unit/whirlpoolv2/en-us/marketing-content/site-assets/page-content/oc-articles/how-to-stack-a-washer-and-dryer/how-to-stack-a-washer-and-dryer-step-5.jpg?fmt=png-alpha&qlt=85,0&resMode=sharp2&op_usm=1.75,0.3,2,0&scl=1&constrain=fit,1)
![](https://kitchenaid-h.assetsadobe.com/is/image/content/dam/business-unit/whirlpoolv2/en-us/marketing-content/site-assets/page-content/oc-articles/how-to-stack-a-washer-and-dryer/how-to-stack-a-washer-and-dryer-step-5.jpg?fmt=png-alpha&qlt=85,0&resMode=sharp2&op_usm=1.75,0.3,2,0&scl=1&constrain=fit,1)
第五步:在烘干机上安装叠脚
在地板上放一块纸板,把烘干机向后倾斜,然后用活动扳手拧下烘干机脚(如果有的话)。如果你的套装有叠脚,用扳手把它们塞进烘干机里,并牢牢固定。小心地把烘干机放回直立位置,用纸板把烘干机滑到洗衣机前面。
第六步:把干衣机放在洗衣机上面
在朋友的帮助下,小心地将干衣机提起洗衣机顶部。放置你的烘干机,使其正面和侧面与洗衣机的正面和侧面齐平,烘干机的后部略高于洗衣机的后部。烘干机应该总是叠在洗衣机上面,因为干衣机往往比洗衣机轻,尤其是装满水的时候。
第七步:固定夹子和支架
你的堆叠工具可能带有塑料夹子。如果是这样,把夹子放在烘干机下缘两侧的插槽上。如果你有困难打开夹子,使用一个平头螺丝刀把他们打开。
将其中一个支架的钩端推到一个塑料夹子上,如果有必要,将烘干机向前移动,使洗衣机和烘干机对齐。使用十字螺丝刀将支架与附件中的螺钉紧固。
![Stacked washer and dryer in a closet 洗衣机和烘干机叠放在壁橱里](https://kitchenaid-h.assetsadobe.com/is/image/content/dam/business-unit/whirlpoolv2/en-us/marketing-content/site-assets/page-content/oc-articles/how-to-stack-a-washer-and-dryer/how-to-stack-a-washer-and-dryer-1.jpg?fmt=png-alpha&qlt=85,0&resMode=sharp2&op_usm=1.75,0.3,2,0&scl=1&constrain=fit,1)
![](https://kitchenaid-h.assetsadobe.com/is/image/content/dam/business-unit/whirlpoolv2/en-us/marketing-content/site-assets/page-content/oc-articles/how-to-stack-a-washer-and-dryer/how-to-stack-a-washer-and-dryer-1.jpg?fmt=png-alpha&qlt=85,0&resMode=sharp2&op_usm=1.75,0.3,2,0&scl=1&constrain=fit,1)
第八步:重新摆放洗衣机和烘干机
一旦你确定你的洗衣机和烘干机是安全连接,重新定位洗衣机和烘干机在其位置,并根据用户手册或安装说明连接你的机器,就是这样!
别担心,如果你最终决定不再想要一个堆叠的洗衣机和烘干机,或者你搬到一个更大的空间,可堆叠的洗衣机和烘干机也有独立的功能,所以你可以卸下烘干机,随时可以并排放置。想要更多节省空间的选择,可以看看惠而浦的堆叠式洗衣中心.
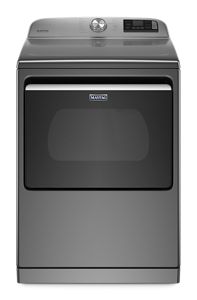
商店的漩涡®可堆叠的洗衣机和烘干机
商店的漩涡®堆叠式洗衣中心
了解更多关于洗衣机和烘干机从惠而浦
![金色家庭心跳标志上方的图像与惠而浦博客页面显示在背景](https://kitchenaid-h.assetsadobe.com/is/image/content/dam/business-unit/whirlpool/en-us/marketing-content/blog-posts/home2.jpeg?fmt=png-alpha&qlt=85,0&resMode=sharp2&op_usm=1.75,0.3,2,0&scl=1&constrain=fit,1)
![](https://kitchenaid-h.assetsadobe.com/is/image/content/dam/business-unit/whirlpool/en-us/marketing-content/blog-posts/home2.jpeg?fmt=png-alpha&qlt=85,0&resMode=sharp2&op_usm=1.75,0.3,2,0&scl=1&constrain=fit,1)
家里的心跳
准备好了解更多小贴士、家庭小妙招和电器指南了吗?